Nextcloud - WebDAV

WebDAV implementation in Nextcloud allows you to mount Nextcloud folders as drives in Windows (or anywhere else with WebDAV support). This way I have a drive that points to the files that are shared with my user on Nextcloud. This guide will describe this.
Nextcloud part
First you need to know where are the accepted shares stored. This can be found and/or set up in Settings - Personal - Sharing. In the very bottom you will find a setting for a folder that holds all the accepted shares. I have it set to "/Shared with me".
While you are in the settings, generate your application password. That can be done in Settings - Personal - Security at the very bottom. This password will then be used to access the WebDAV share.
Then you go to Files app and in Files settings - WebDAV you will get your WebDAV address for your user root folder. This address can be adapted to point to any other folder deeper in the structure. In my case I changed it to https://cloud.example.md/remote.php/dav/files/vitis/Shared with me.
Windows part
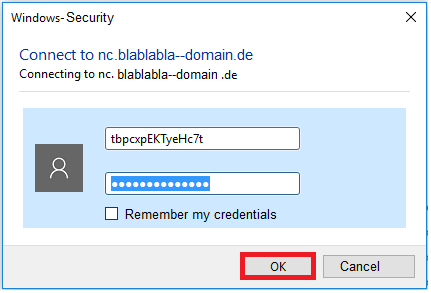
Now you can go to Windows and directly mount the WebDAV share as a network drive. Everything will work and you will be happy. That is until you reboot or relogin to your Windows account. Then you will realize, that you have to log in to map your share every single time. It has something to do with Basic Authentication that is used.

Unraid part
I sorted this problem out with a help from Unraid. I used rclone as an intermediate layer. So the WebDAV share is mounted in rclone and then shared out as an SMB share on the network.
I suggest you install rclone as a plugin to Unraid. There is also a docker container available but I did not had luck with that. I think it might be because rclone needs a lot of special privileges to run properly and I could not find the right combination of those but YMMV.
Now you have to create your rclone remote config. Each remote has to be configure separately. More on the WebDAV config can be found in rclone's documentation.

Your config can be then found in Settings - rclone. This config can vary if you use a different type of remote.
[Nextcloud-vitis-shared]
type = webdav
pass = C^VsH4$zJoUC#ahW!UfVYJPWp
url = https://cloud.example.md/remote.php/dav/files/vitis/Shared with me
user = vitis
vendor = Nextcloud
My remote config of Nextcloud WebDAV share
After setting up the remote you can mount it through the CLI. This will mount the remote to the specified folder using with the specified user and group. All the specified options are well explained in the documentation.
#!/bin/bash
mkdir -p /mnt/disks/vitis
rclone mount Nextcloud-vitis-shared: /mnt/disks/vitis --vfs-cache-mode full --daemon --gid 100 --uid 1000 --allow-other --allow-non-empty
Command to mount the WebDAV share
Now the folder /mnt/disks/vitis points to our Nextcloud. Now we need to expose this as an SMB share. Unraid can do this without any other extra tools. Just head to Settings - SMB - SMB Extras and put in a config for a the share that can look something like this.
[vitis-shared]
path = /mnt/disks/vitis
comment =
browseable = yes
public = no
writeable = yes
valid users = vitis
vfs objects =
SMB Extras config
The config again sets the permissions to just single user and sets is as non public share. This gives access just to my user and denies access to any guests. Some more details can be found in Samba documentation.

Windows part - part 2
Now you should be able to see the share in your network. You can assign map it as a network drive and see all the files that are shared with you. This is a small finale, but we still need to do a bit more to make everything persistent.
Unraid part - part 2
Use User scripts plugin to run the mount command above on every array start up. You will also need a unmount script that will run on every array spin down.
#!/bin/bash
umount /mnt/disks/vitis
Command to unmount the WebDAV share
Now everything will mount and unmount whenever you restart your server. If you will add more users do not forget to update all three places - mount script, unmount script and SMB Extras.
pfSense part
Now if your domain is behind a Cloudflare proxy, like mine, you will be accessing the WebDAV over the internet thus utilizing your down/up link. This is something that your do not want to do. Unless you are on a 1000/1000 connection and then you probably don't care. 😄
In DNS Resolver settings in Host Overrides section I set cloud.example.md to return my WAN IP. Now this works only if your Cloudflare SSL/TLS encryption mode is Full and not Full (Strict).
If I remember correctly you also would like to turn Enable automatic outbound NAT for Reflection in System - Advanced - Firewall & NAT. This enables NAT Reflection (aka Hairpin NAT). This should make your packets not even leave the LAN interface. On the same page NAT Reflection mode for port forwards has to be set to Pure NAT.

Now this might differ if you don't use pfSense router, but the terms above should at least point you the correct way.
Possible troubleshooting steps
03/2024: I was adding a user to this and I completely skipped few parts. 😄 First of all, I did not went through the proper remote setup. I just copied my settings and updated them with new credentials. This did not work, because the config has the password saved in base64. I fixed this with updating the password through rclone.

Other mistake was that the folder in /mnt/disks/ created by the mount script had root as an owner. Always check permissions and ownership.

